Important Information
This website is managed by Ultima Markets’ international entities, and it’s important to emphasise that they are not subject to regulation by the FCA in the UK. Therefore, you must understand that you will not have the FCA’s protection when investing through this website – for example:
- You will not be guaranteed Negative Balance Protection
- You will not be protected by FCA’s leverage restrictions
- You will not have the right to settle disputes via the Financial Ombudsman Service (FOS)
- You will not be protected by Financial Services Compensation Scheme (FSCS)
- Any monies deposited will not be afforded the protection required under the FCA Client Assets Sourcebook. The level of protection for your funds will be determined by the regulations of the relevant local regulator.
Note: Ultima Markets is currently developing a dedicated website for UK clients and expects to onboard UK clients under FCA regulations in 2026.
If you would like to proceed and visit this website, you acknowledge and confirm the following:
- 1.The website is owned by Ultima Markets’ international entities and not by Ultima Markets UK Ltd, which is regulated by the FCA.
- 2.Ultima Markets Limited, or any of the Ultima Markets international entities, are neither based in the UK nor licensed by the FCA.
- 3.You are accessing the website at your own initiative and have not been solicited by Ultima Markets Limited in any way.
- 4.Investing through this website does not grant you the protections provided by the FCA.
- 5.Should you choose to invest through this website or with any of the international Ultima Markets entities, you will be subject to the rules and regulations of the relevant international regulatory authorities, not the FCA.
Ultima Markets wants to make it clear that we are duly licensed and authorised to offer the services and financial derivative products listed on our website. Individuals accessing this website and registering a trading account do so entirely of their own volition and without prior solicitation.
By confirming your decision to proceed with entering the website, you hereby affirm that this decision was solely initiated by you, and no solicitation has been made by any Ultima Markets entity.
I confirm my intention to proceed and enter this website Please direct me to the website operated by Ultima Markets , regulated by the FCA in the United KingdomA Quick Guide to the Awesome Oscillator
Want a simple way to spot when momentum quietly flips before price does? The awesome oscillator gives you that early read, helping beginners see when momentum is shifting without complex settings. It compares short-term and long-term movement, plots the result as a simple histogram, and highlights when buyers or sellers may be taking control.
In the sections ahead, you will get a quick understanding of what it is, how to read it with confidence, and a straightforward way to put it to work.
What Is the Awesome Oscillator

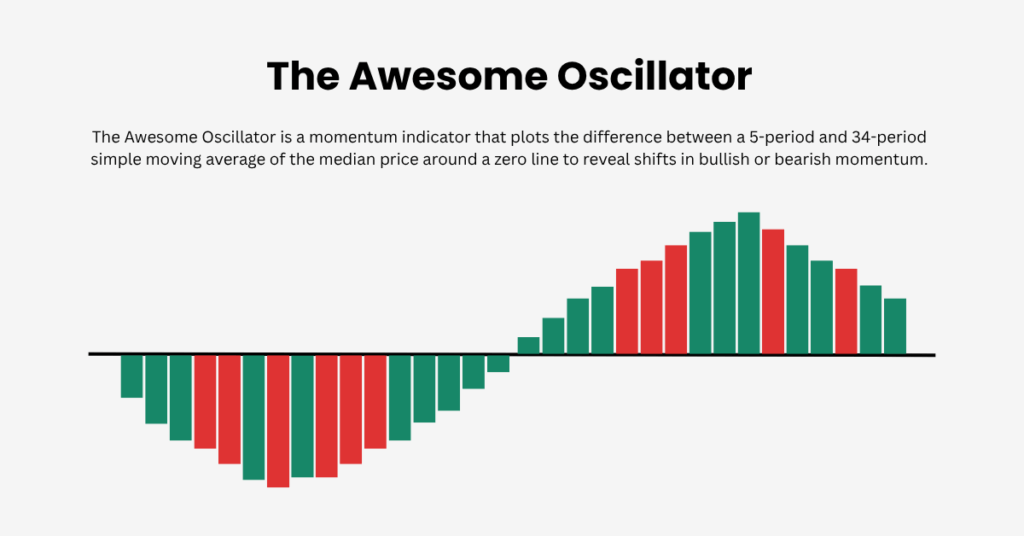
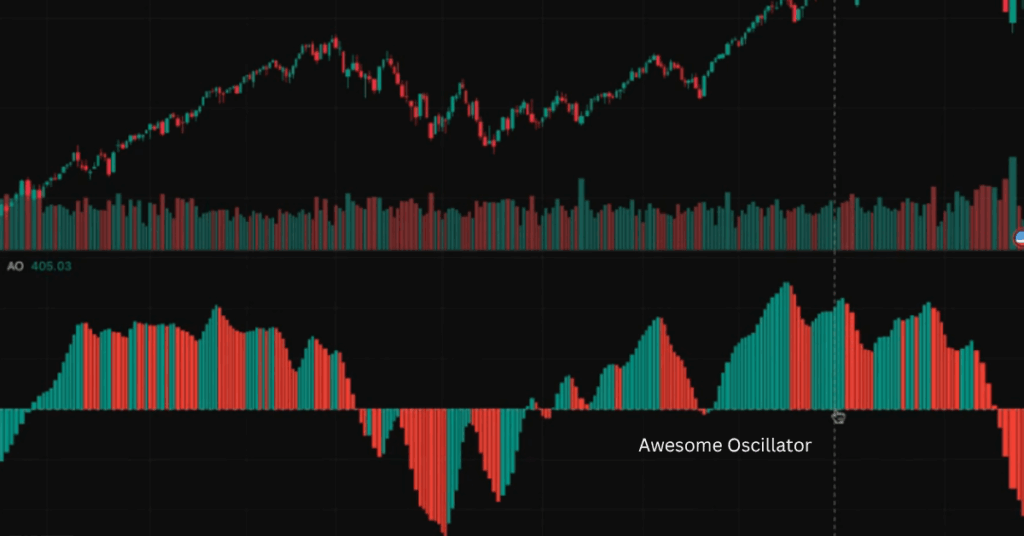
The awesome oscillator (AO) is a momentum indicator by Bill Williams. It sits beneath your price chart as a histogram centred on a zero line. Before we dive into the rules, it’s useful to understand what the bars mean in plain language.
- Above zero usually signals bullish momentum.
- Below zero usually signals bearish momentum.
- The changing height and colour of bars show momentum strengthening or weakening.
How the Awesome Oscillator Is Calculated
A quick look under the hood helps you trust what you’re seeing on the chart. You don’t need to compute it by hand, but knowing the formula prevents common misunderstandings.
- Median Price per candle = (High + Low) ÷ 2
- Awesome oscillator = SMA(5) of Median Price − SMA(34) of Median Price
Each bar is the difference between those two SMAs (not an average). A bar turns green when today’s AO value is higher than the previous bar, and red when it’s lower. The default 5/34 settings are beginner-friendly and work across markets.
How to Read the Awesome Oscillator
Think of the zero line as your “who’s in control” reference. Then, read the sequence of bars like a story about momentum, not as isolated signals.
- Above zero + rising bars → buyers gaining strength.
- Above zero + shrinking bars → buyers losing steam.
- Below zero + falling (more negative) bars → sellers gaining strength.
- Below zero + rising (less negative) bars → sellers losing steam.
Always pair the awesome oscillator with basic price structure (higher highs/lows or lower lows/highs) and obvious support or resistance.

Core Signals: Simple Rules That Work
Before you trade any pattern, set the context: trend direction, nearby levels, and session liquidity. The checklists below keep you disciplined and reduce guesswork.
Zero-Line Cross (Confirmation, Not an Auto-Entry)
A zero-line cross tells you when short-term momentum overtakes the longer-term baseline. Treat it as confirmation that aligns with structure, not a standalone trigger.
- Long bias if AO crosses from below to above zero and price makes higher highs/higher lows.
- Short bias if AO crosses from above to below zero and price makes lower lows/lower highs.
- If the cross occurs into nearby support/resistance, wait for a pullback.
Saucer (Trend Continuation)
The saucer highlights a brief pause in momentum before the trend resumes. It’s most reliable when taken with the prevailing direction.
- Bullish saucer: AO above zero, two red bars with the second lower, then a green bar. Invalid if AO dips below zero.
- Bearish saucer: AO below zero, two green bars with the second higher, then a red bar. Invalid if AO pops above zero.
Twin Peaks (Potential Reversal)
Twin peaks signal fading momentum on one side of zero. Use them at meaningful levels to avoid random mid-range flips.
- Bullish twin peaks: two troughs below zero, the second less negative; AO stays below zero between troughs; a green bar confirms.
- Bearish twin peaks: two peaks above zero, the second lower; AO stays above zero between peaks; a red bar confirms.
- A later zero-line cross strengthens the turn.
Divergence (Best at Key Levels)
Divergence compares price swings with momentum swings. It warns when price pushes further but the awesome oscillator refuses to confirm.
- Bullish: price makes a lower low while AO makes a higher low.
- Bearish: price makes a higher high while AO makes a lower high.
- Prioritise daily/weekly support or resistance, not mid-range.
A Step-By-Step Trading Plan
To move from theory to practice, follow a simple flow that starts with direction, then looks for a clean trigger, and finally manages risk and exits.
Step 1: Define Bias on a Higher Timeframe
Set your compass before you zoom in. The higher timeframe keeps you trading with broader momentum.
- Trade long only if higher-TF AO is above zero and rising.
- Trade short only if higher-TF AO is below zero and falling.
Step 2: Choose a Clean Entry Trigger
Pick one trigger that matches your higher-TF bias. Consistency beats chasing every wiggle.
- Pullback + rejection at a prior zone while AO stays on the bias side of zero and prints a momentum resumption bar.
- A valid saucer in the trend direction.
- Twin peaks at a key level, followed by a minor structure break.
Step 3: Place a Logical Stop
Stops belong where your trade idea is clearly wrong, not where the loss “feels” comfortable.
- Beyond the pullback extreme for structure entries.
- Beyond the second peak/trough for twin peaks to allow normal volatility.
Step 4: Size the Position
Sizing translates “risk per trade” into actual units. This keeps your losses uniform and your mindset steady.
- Risk a fixed fraction per trade (e.g., 0.5%–1%).
- Size by the distance from entry to stop so each trade risks the same amount.
Step 5: Take Profits and Manage the Trade
Plan exits before you click buy/sell. Let the awesome oscillator help confirm when momentum is fading.
- First scale at 1.5R–2R or the next swing level.
- Trail the rest while AO remains favourable on the same side of zero.
- Consider exiting if AO prints two to three bars against you or crosses the zero line with a structure break.
Common Mistakes of the Awesome Oscillator
Small process tweaks can save you from most false signals. Use the pitfalls and pointers below as a pre-trade checklist.
Mistakes to Avoid
These are the traps beginners fall into when they rely on a single signal without context.
- Chasing late zero-line crosses after extended moves. Wait for a pullback.
- Take counter-trend saucers only on the correct side of zero in a confirmed trend.
- Forcing divergence mid-range. Keep divergence for major levels.
- Over-optimising inputs. Stick to defaults, forward-test, and judge by execution quality.
Pro Tips for Beginners
A few add-ons elevate the awesome oscillator from a signal to a full plan.
- Combine AO with a simple 50-SMA trend filter (rising for longs, falling for shorts).
- Let MACD flag a potential turn, then use AO to confirm staying power around zero.
- Journal screenshots of setups and outcomes to refine your rules.
Conclusion

For beginners, the awesome oscillator is most powerful as a momentum timing tool inside a simple plan. Read the zero line for control, use saucer for continuation, reserve twin peaks for turning risk at key levels, and treat zero-line crosses as context rather than automatic entries. Blend AO with structure, trend filters, and steady risk rules to avoid low-quality trades and stay with the moves that matter.
Disclaimer: This content is provided for informational purposes only and does not constitute, and should not be construed as, financial, investment, or other professional advice. No statement or opinion contained here in should be considered a recommendation by Ultima Markets or the author regarding any specific investment product, strategy, or transaction. Readers are advised not to rely solely on this material when making investment decisions and should seek independent advice where appropriate.


